

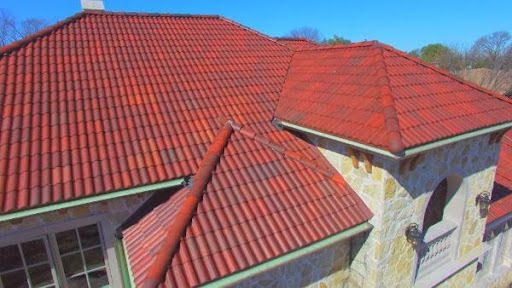
If you love Mediterranean architecture then you are naturally a fan of clay terracotta roofing. With a history that goes back hundreds of years, this type of roofing is as popular as ever, and the appeal includes more than aesthetics:
- Terracotta carries a Class A fire rating.
- It performs well in high wind conditions.
- Clay returns the heat it absorbs during the day to the atmosphere in the evening.
Natural clay roof tiles do not perform well in every category, however:
- They are extremely heavy and difficult to handle.
- Specialists are needed to install them.
- The roof may require additional substructure to support them.
- Maintenance is very expensive.
- Color can fade over time and be very difficult to restore.
Fortunately, there is a way to get the terracotta roof look without the negative aspects of this material: Synthetic composite roof tiles from Brava.
Cost Comparison Between Terracotta Roofing And Brava Composite Tiles
Every situation is not the same, and part of any cost comparison would have to include whether the job was new construction or a roof replacement. In the case of a reroof, terracotta could prove to be more costly than it already is if additional roof structure is required to support the weight of the clay tiles. Let’s compare the costs based on a new construction home.
Terracotta Clay Tiles
On average, clay roof tiles will cost between $7- $12 per square foot, installed. These numbers may vary depending upon availability of both labor and materials. However, the true cost of terracotta roofing needs to add in the maintenance costs of $1500 - $3000 over the life of the roof. The maintenance needs to be done by a roofer experienced with terracotta roofing or more damage could result in conducting the repair. If any of the tiles need to be replaced, costs can range between $9 - $21 a square foot, plus setup fees. In this comparison, using a new construction home, what is not being shown is the hidden cost of the additional structural elements that would need to be added to the roof during the building process. These types of upgrades can cost thousands of dollars.
Brava Spanish Barrel Roof Tiles
Brava’s barrel roof tiles cost between $8 - $18 per square foot, installed. As with terracotta, installer costs may vary by location. What will not change is that our composite barrel tile is much lighter than clay and can be installed over a truss roof without additional support.

Our tiles are maintenance-free and almost impervious to breaking, which means that there are no surprise fees down the road for maintenance and repairs. Brava’s color runs all the way through the tile, almost eliminating issues with fading. In the long run, Brava’s barrel tile roofing will give you the look of terracotta without the extra costs.
How To Install A Brava Spanish Barrel Tile Roof
Contact A Qualified Installer
Brava is a manufacturer and as such does not perform installations. What we can do:
- Brava can help find a roofer familiar with their products.
- The Brava website contains guides and videos to help your roofer.
Order All Materials Needed To Complete The Job
Typically, the roofing contractor will order all materials, but if this is not the case, the homeowner needs a complete list of materials to order provided by the roofer.
Establishing A Timeline
The normal timeframe to install a 2,000 square foot roof would be between 3-5 days depending upon the complexity.
- Good weather is necessary for a great install.
- Don’t start until all materials have arrived and are available.
Step-By-Step Installation Guidelines For Brava Spanish Barrel Tile Roofing
This section will highlight the basic instructions for installing Brava Spanish Barrel Tiles. There are extensive instructions available on the website (including a very informative video), but this will be an excellent primer on the subject. The tiles must be installed over a minimum 15/32” CDX which is commonly referred to as ½” CDX plywood. On top of this, place a synthetic underlayment. This provides a water barrier between the roof tiles and the plywood. After this, you will need to install your drip edge flashing, as well as ice and water shield, if required by your local codes. Starting the first course, you will use Brava’s special design starter tile that provides support for the first row of barrel tiles and locks them into the structure. This piece is attached using two regular roofing nails. They need to be long enough to penetrate as least ½” into the plywood. After this, the first row of tiles is attached to the starter strips using two roofing nails and making sure the bottom of the tile fits over the starter tile to secure it. As you move up the roof you establish the overlap by hanging the following row with a half tile and alternating between half and full until you reach the peak. If you prefer to use batten strips to allow an air space between the tiles and the roof deck, this is allowable. There are two scenarios on the video you can choose from. One allows you to choose 48” long 1x2 battens and the other details how you can use longer pieces.
Brava Roof Tiles Provide Maximum Value

As a leader in the synthetic composite roofing industry, Brava excels in delivering eco-friendly products at competitive prices. Our roof tiles are made from 100%-recycled materials, and unlike other products, they can be recycled again.
Contact us today for your free samples and see why Brava is the choice of homeowners and professional roofers alike.


